How to Organize Folders in Outlook

How to Organize Folders in Outlook Training Workshop in Singpaore

How to Organize Folders in Outlook Training Workshop in SingpaoreIn today’s fast-paced business environment, professionals like office executives and managers are inundated with emails. An overflowing inbox can be overwhelming, leading to missed important messages and decreased productivity. Microsoft Outlook offers robust features for organizing emails, and is a great tool that we live with each day.

Learning how to organize Outlook email is crucial for effective email management. The article provides a step-by-step guide on the best way to organize emails in Outlook, including how to create folders to organize email in Outlook.

This article aims to demystify the process of managing and organizing emails in Outlook, offering practical, easy-to-understand solutions that are immediately applicable in a professional setting within your Microsoft Outlook software.

When organizing folders in Outlook, one should adhere to the best practice of establishing a logical and intuitive structure based on the content and purpose of each folder. This ensures easy navigation and quick access to important emails, following the recommended outlook folder structure best practice.

Creating Folders for Different Workflows

Creating a structured folder system in Outlook based on different stages of your workflows can significantly enhance email management, especially for business professionals and office executives. Here’s how to effectively organize your Outlook folders for different workflows:

1. Workflow Stages-Based Folders

  • Function: Categorize emails according to where they fit in your work process.Outlook Folder Organization Tips
  • Examples:
    • “Inbox – Action Needed”: For emails requiring immediate action or response.
    • “Waiting on Response”: For emails where you’ve replied and are awaiting a response. This helps track ongoing communications.
    • “To Review”: For emails that need your review or are informational and can be read later.

2. Project-Specific Folders

  • Function: Organize emails based on specific projects or clients.
  • Examples:
    • “Project Alpha – Communications”: All emails pertaining to ‘Project Alpha’.
    • “Client XYZ – Inquiries”: Separate folder for each major client or stakeholder.
    • “Internal – HR Updates”: For internal communications, such as HR announcements or company-wide updates.

3. Priority-Based Folders

  • Function: Prioritize emails based on their urgency or importance.
  • Examples:
    • “Urgent”: For emails that require immediate attention.
    • “High Priority”: For important emails that need to be addressed soon but are not urgent.
    • “Low Priority”: For non-urgent emails that can be dealt with at a later time.

4. Time-Sensitive Folders

  • Function: Organize emails based on when they need to be addressed.
  • Examples:
    • “This Week”: For emails that need to be dealt with within the current week.
    • “This Month”: For less urgent emails that need to be addressed within the month.
    • “Quarterly Review”: For emails that pertain to quarterly goals and reviews.

5. Custom Categories for Special Cases

  • Function: Create folders for unique or unusual email types that don’t fit into other categories.
  • Examples:
    • “Conference 2025”: For all emails related to a specific event or conference.
    • “Expense Reports”: For tracking emails related to expenses and reimbursements.
    • “Feedback and Surveys”: For storing customer feedback or survey responses.

6. Archive for Completed Workflows

  • Function: Move emails from active folders to an archive once the workflow is completed.
  • Example: After completing a project, move all relevant emails from “Project Alpha – Communications” to “Project Alpha – Archive” for historical reference.

7. Regular Maintenance

  • Function: Regularly review and clean up folders to keep them relevant and manageable.
  • Example: At the end of each week, review the “This Week” folder, archiving completed items and moving pending items to the “Next Week” folder.

By adopting this structured approach to organizing folders in Microsoft Outlook, business professionals can streamline their email management, ensuring that their inbox aligns with their workflow and priorities, ultimately enhancing productivity and reducing email clutter.

Microsoft Outlook Training course in Singapore at Intellisoft Systems

Optimizing Outlook Folders for Searching

Optimizing your Outlook folders for effective searching is crucial for quick information retrieval, especially in a busy work environment. Here’s how to structure and name your folders for optimal searchability:

1. Descriptive Folder Naming

  • Function: Use specific, descriptive names for each folder to make them easily identifiable and searchable.
  • Examples:
    • Instead of vague names like “Reports,” use “2024 Financial Reports” or “Q1 Marketing Analytics.”
    • For client correspondence, instead of just “Clients,” use “Client – [Client Name] – [Year].”

2. Organize Emails by Date and Time

  • Function: Create folders based on specific time periods to easily locate emails from a certain date range.
  • Examples:
    • “2024 Correspondence”: For all emails sent and received in 2024.
    • “Weekly Updates – February”: For weekly status updates in February.
    • “Meeting Minutes – Q1 2024”: For all meeting minutes from the first quarter of 2024.

3. Category-Based Folders

  • Function: Organize emails by categories such as project, department, or type of communication. You can create a new category easily.
  • Examples:
    • “HR Policies”: For all emails related to human resources policies.
    • “IT Support Tickets”: For correspondence related to IT issues.
    • “Vendor Contracts”: For keeping track of discussions and agreements with vendors.

4. Using Keywords in Folder Names

  • Function: Include relevant keywords in folder names to enhance the searchability of new folders.
  • Examples:
    • “Budget Approval – Marketing”: For emails related to budget approvals in the marketing department.
    • “Conference 2024 – Speaker Coordination”: For organizing emails regarding speakers at a 2024 conference.

5. Subfolder Strategies

  • Function: Use subfolders judiciously to avoid overcomplication while maintaining order. A new folder inside another new folder can be very addictive, but it is not a very good technique.
  • Examples:
    • Under a main folder “Client Projects,” have subfolders named after each client or project.
    • For a folder named “Events,” use subfolders like “Webinars,” “Workshops,” and “Networking Events” for specific event types. Having a different folder for each major topic is the best way to find relevant folders as and when needed.

6. Regular Folder Review and Cleanup

  • Function: Periodically review folders to update names, merge similar folders, and delete outdated ones.
  • Example: At the end of each quarter, review and adjust folder names and structures to reflect current priorities and projects.
  • Arrange selected folder in the favorites list for easier navigation.

7. Archiving and Backup Strategies

  • Function: Regularly archive old emails and ensure backups are in place for easy retrieval.
  • Example: Set up a quarterly archiving system where older emails are moved to an archive folder, labeled by year and quarter for easy access.

8. Integration with Outlook Search Features

  • Function: Leverage Outlook’s powerful search tools to complement your organized folder structure.
  • Example: Use Outlook’s advanced search options to find emails based on specific criteria like a specific sender, date, or keyword that align with your folder naming conventions.

Using Quick Steps and Archive

  • Example: Set a Quick Step to move all emails from a particular project team directly to a designated folder. Regularly archive completed project emails to keep the inbox focused on current tasks.

Learn Microsoft Outlook from Experts at Intellisoft Systems

Time-Saving Tools and Shortcuts: A Great Way To Save Time With Outlook

1. Outlook Rules for Automated Organization

  • Function: Automatically move, categorize, or flag incoming emails based on specific criteria like sender, subject, or keywords.
  • Example: Create a rule to move all emails from your supervisor directly to a “Manager Communications” folder. This ensures important messages are not lost in a crowded inbox. There are a few default Outlook email categories to help you get started.

2. Search Folders for Quick Access

  • Function: Create folders that automatically gather email messages based on specified search criteria.
  • Example: Set up a search folder for all emails with the subject “Project Updates,” enabling quick access to all project-related communications without manually searching each time.

3. Shortcut Keys for Efficient Email Management

  • Function: Use keyboard shortcuts to perform common tasks quickly.
  • Key Shortcuts:
    • Ctrl+C (Copy), Ctrl+V (Paste): Quickly move emails to different folders.
    • Ctrl+R (Reply), Ctrl+F (Forward): Respond to emails swiftly.
    • Ctrl+Shift+V (Move to Folder): Move an email to a specific folder without dragging.
    • Ctrl+Shift+Q (Create Meeting Request): Quick way to schedule a meeting from an email.
  • Example: Use Ctrl+Shift+V to move an email to the “Completed Projects” folder after finalizing a project.

4. Pin Folders for Easy Access

  • Function: Keep frequently used folders at the top of your navigation pane.
  • Example: Pin your “Urgent” and “Read Later” folders for quick access, ensuring critical emails are addressed first and interesting reads are easily accessible.

5. Quick Steps for One-Click Actions

  • Function: Customize a series of actions that can be applied to an email with a single click.
  • Example: Create a Quick Step to flag an email, mark it as read, and move it to a specific project folder, streamlining email processing.

6. Categorization for Visual Organization

  • Function: Assign color-coded categories to emails for quick visual identification.
  • Example: Assign a green category to all “Client Requests” and a red one for “Internal Deadlines”, making these emails stand out in your inbox.

7. Conversation View for Threaded Messages

  • Function: Group all related emails into a single conversation thread.
  • Example: Use Conversation View for ongoing project discussions, keeping all related emails together for easy reference.

8. Focused Inbox to Prioritize Important Emails

  • Function: Separates your inbox into two tabs—Focused and Other—to prioritize important emails.
  • Example: Enable Focused Inbox to ensure emails from key clients or management are highlighted, reducing distractions from less critical messages.

9. Email Templates for Repetitive Responses

  • Function: Pre-create templates for common email responses.
  • Example: Develop templates for standard replies like acknowledgments or weekly updates, saving time in composing similar responses.

10. Archive Feature for Long-Term Storage

  • Function: Move old emails to an archive folder, keeping them accessible but out of your main inbox.
  • Example: Archive completed project correspondence, keeping your primary inbox focused on current activities.

11. Custom Views for Personalized Email Sorting

  • Function: Create custom views in Outlook to display emails based on specific criteria like sender, date, or size.
  • Example: Set a custom view to show all emails larger than 1MB, helping you to quickly identify and clean up large files clogging your inbox.

By utilizing these time-saving tools and shortcuts in Outlook, business professionals can significantly streamline their email management, saving precious time and reducing the stress of an overflowing inbox​

Additional Features and Techniques of Outlook Email Organization

In addition to basic folder organization, Microsoft Outlook offers a range of features and techniques that can further enhance your email management experience and get control of your inbox. Here’s some tips & tricks, the easiest way to avoid email overload.

1. Focused Inbox Feature

  • Function: Separates your inbox into two tabs: Focused and Other, to prioritize important emails.
  • How to Use: Enable Focused Inbox in settings. Outlook automatically sorts emails, but you can manually move emails between tabs to teach it your preferences.
  • Example: Priority emails from clients or management appear in the Focused tab, while newsletters and promotional emails are moved to Other.

2. Outlook Categorization

  • Function: Assign color-coded Outlook categories to emails for quick identification and grouping.
  • How to Set Up: In the Home section, select Categorization, choose a color, and rename it as per your preference.
  • Example: Categorize emails by project, urgency, or department, like using blue for all “Project Titan” emails or red for “Urgent Queries.”

3. Archive and Delete Old Messages

  • Function: Archive for long-term storage of important emails; delete for removing unnecessary emails.
  • How to Use: Select a message and click the archive button or the delete button. Set up an archive folder if not already in place.
  • Example: Archive completed project emails but delete outdated promotional emails.

4. Conversation View

  • Function: Groups all related emails into a single thread, making it easier to follow a conversation.
  • How to Enable: Turn on “Show as Conversations” in the View menu.
  • Example: All emails regarding a specific project update are compiled into one thread, reducing clutter and enhancing readability.

5. Use of Clean Email or Similar Tools

  • Function: External tools like Clean Email can help manage your inbox by setting automatic filters and rules.
  • How to Use: Set up rules within the tool to organize emails as they hit your inbox.
  • Example: Automatically sort newsletters into a “Read Later” folder or promotional emails into a “Marketing” folder.

6. Flagging Emails for Follow-Up

  • Function: Flag important emails that you need to follow up on.
  • How to Use: Select an email, click on the Follow up option, and choose a time for the reminder.
  • Example: Flag an email from a client that requires a detailed response by the end of the week.

7. Integration with Microsoft To Do and Other Tools

  • Function: Sync Outlook with Microsoft To Do or other task management tools for better task tracking.
  • How to Use: Use Microsoft To Do (or other integrated tools) to create tasks directly from emails.
  • Example: Create a task in Microsoft To Do for preparing a report mentioned in an email, with a due date and reminder.

8. Effective Use of Email Templates

  • Function: Use templates for sending frequent types of responses or communications.
  • How to Use: Create and save templates for different types of email responses.
  • Example: Templates for weekly updates, project queries, or standard responses to common questions.

9. Smart Folders and Filters

  • Function: Use smart folders to automatically categorize emails based on set criteria.
  • How to Set Up: Create smart folders for specific types of emails, like all emails with attachments.
  • Example: A smart folder for all emails from a specific project team or with a particular keyword in the subject.

10. Leveraging Outlook Add-Ins

  • Function: Enhance Outlook’s capabilities with add-ins for various purposes.
  • How to Use: Browse and install add-ins through the Outlook store.
  • Example: Add-ins for CRM integration, email tracking, or productivity tools like Trello or Evernote.

Learn how to organize Outlook email effectively by following simple steps to declutter your inbox. Discover the best way to organize emails in Outlook to find messages instantly and improve productivity. Visit the site for expert guidance on how to organize folders in Outlook for efficient email management.

General Best Practices For Using Microsoft Outlook & Finding Specific Emails Easily
Best Practices for Organizing Outlook Emails

Implementing general best practices in managing your Outlook folders can significantly improve your overall email productivity and efficiency. My most recommended best practices for avoiding email overload and gaining sanity over your email box are:

1. Regular Archiving of Old and Unimportant Messages

  • Purpose: Keeps your inbox clean and makes important emails more accessible.
  • Approach: Use Outlook’s built-in archiving feature or external tools to automatically move older messages to an archive folder.
  • Example: Set a rule to archive all emails older than six months to keep your inbox focused on current communications.

2. Creating Rules to Automatically Sort Incoming Mail

  • Purpose: Saves time by automatically organizing incoming emails into the appropriate folders.
  • How to Implement: Go to the Home tab, select Rules > Manage Rules & Alerts, and create new rules based on criteria like sender or subject line.
  • Example: Create a rule to move all emails from a specific client directly to their dedicated project folder.

3. Organizing Email Folders into Categories

  • Purpose: Enhances folder visibility and accessibility.
  • Strategy: Group similar folders under a common category for easy navigation.
  • Example: Create a category like “Clients” and include all individual client folders under it.
  • Color Codes: You can assign a color code to each category too, making it easy to identify the folders and emails easily.

4. Immediate Deletion of Spam

  • Purpose: Protects against potential security threats and keeps your inbox clutter-free.
  • Action: Set rules in Outlook to move suspicious emails to the Junk folder automatically.
  • Maintenance: Regularly check the Junk folder for false positives and adjust your spam filters accordingly.
  • Empty Deleted Items: Empty the deleted items folder on a regular basis to keep the Outlook mailbox light.

5. Ensuring Adequate Storage Space

  • Purpose: Prevents your inbox from getting overloaded, which can affect Outlook’s performance.
  • Approach: Regularly delete irrelevant emails and large files; consider using cloud storage for archiving.
  • Example: Periodically review and clean up large email attachments and outdated email threads.

6. Maintaining a Clean Sent Items Folder

  • Purpose: Keeps track of sent communications without overloading the folder.
  • Strategy: Create subfolders within the Sent Items folder based on the type or purpose of the emails.
  • Example: Subfolders like “Sent – Client Communications” and “Sent – Internal Meetings” can organize sent emails effectively.

7. Avoiding Overuse of Subfolders

  • Purpose: Prevents folder structure from becoming too complex and hard to navigate.
  • Best Practice: Limit subfolders to a few levels and use descriptive names.
  • Example: Instead of multiple nested levels, use a clear and concise folder hierarchy that aligns with your workflow.

8. Consistent Folder Review and Cleanup

  • Purpose: Keeps your folder structure relevant and manageable.
  • Routine: Set a regular schedule, like monthly, to review, rename, merge, or delete folders.
  • Example: At the end of each month, review project folders to archive completed projects and update ongoing ones.

9. Leveraging Outlook’s Search Functionality

  • Purpose: Quickly locates emails without the need for extensive folder navigation.
  • Tip: Familiarize yourself with advanced search options like searching by date, sender, or specific keywords.
  • Example: Use search queries like “from:[sender name]” or “subject:[specific keyword]” for efficient email retrieval.

By implementing these strategies, business professionals can efficiently manage their Outlook inbox, ensuring that important emails are always at their fingertips, and their email management becomes a productivity tool rather than a source of stress. Use them to stay on top of your emails.

 

PMP Exam Preparation: Preview Sessions Each Month

Group of Participants attending the PMP Certification program at Intellisoft Systems Singapore

Are you an active Project Manager?

Are you looking for ways to stand out, accelerate your career and get recognition?

If you are, then you should be planning to get the most coveted Project Management Professional (PMP) Certification from PMI Inc. of USA.

It is the top qualification for Project Managers, and is very well received in Singapore. In fact, Singapore ranks as one of the Top 5 countries where the maximum number of PMPs come from.

The PMP exam is not easy. More than half the people who attempt the exam can’t pass it in their first attempt. So don’t take this lightly.

Intellisoft is holding  regular Preview Sessions where our senior PMP trainers will give you an overview of the exam.

Some of the Topics covered in the Intellisoft PMP Exam Preview Session are:

  • About the PMP Exam,
  • Eligibility criteria for the PMP Exam,
  • Methodology used in  the Intellisoft 4 Day PMP Exam Preparation Workshop (available on Weekdays or Weekends)
  • Our Trainers
  • Our exam centric teaching approach
  • WSQ Grant, eligibility, how to claim, claim % etc.
  • The Intellisoft PMP Exam Passing Percentage
  • Change to the Exam, its format,
  • Types of PMP Exam Questions, and the Right approach to answer the questions.
  • Question & Answers Session – where you can ask any questions you have, and our PMP trainers will answer them for you.

If you would like to attend the PMP Exam Preview session at Intellisoft, you can join us by sending an email to Lisha.

Intellisoft Training Schedule:
Intellisoft will be hosting Weekday and Weekend Training Programs for PMP Exam Preparations. You can check the latest PMP Training Schedule here.

Registration for the PMP Exam Prep Workshop:
You can register online for the PMP Training conducted at Intellisoft.

36 Contact Hour Certificate:
Intellisoft Systems will provide you with a 36 PDU certificate at the end of the 4th day PMP training program. This will enable you to attain Education Requirements for the PMP examination.

PMI Registered Education Provider (PMI R.E.P.)
Intellisoft Systems has been awarded the Global PMI Registered Education Provider by PMI. So you can be sure that you are getting quality PMP training and education, provided by our PMP Certified Trainers.

Simply sign up for the PMP Preview Session, and get to know more about how you can qualify and attain the PMP Certification, and boost your career with professional certification!

See you for the PMP Exam Preview Talk at Intellisoft Training Centre in Singapore!

Register Now

From Good to Great: Enhancing Your Skill Set with a Soft Skills Course in Singapore

soft skills training providers in singapore

Are you ready to take your career from good to great?

Enhancing your skill set with a soft skills course in Singapore can be the game-changer you’ve been looking for.

While technical expertise is important, it is often the soft skills that set top performers apart from the rest.

In today’s competitive job market, employers are seeking candidates who not only excel in their field but also possess strong communication, leadership, and problem-solving abilities.

A soft skills course Singapore can equip you with these essential skills and give you a competitive edge.

Singapore, known for its world-class educational institutions, offers a wide range of soft skills courses tailored to various industries and career levels.

Whether you’re a recent graduate, mid-career professional, or seasoned executive, there is a course that can help you sharpen your interpersonal skills and elevate your career prospects.

Investing in a soft skills course not only enhances your employability but also opens doors to leadership opportunities and career advancement.

So, why wait?

Take that leap and embark on your journey to greatness by enrolling in a soft skills course in Singapore today.

The importance of soft skills in the workplace

In today’s fast-paced and interconnected world, technical skills alone are no longer sufficient for success in the workplace.

Employers are increasingly recognizing the value of soft skills in driving team collaboration, customer satisfaction, and overall business success.

Soft skills refer to a set of personal attributes and behaviors that enable individuals to effectively interact and communicate with others.

They include skills such as

While hard skills are specific to a particular job or industry, soft skills are transferable and can be applied across various roles and situations.

They are crucial in building strong relationships, resolving conflicts, and fostering a positive work environment.

What are soft skills and why do they matter?

soft skills course singapore

Soft skills are the intangible qualities that enable individuals to navigate the complexities of the modern workplace.

They encompass a wide range of abilities that go beyond technical expertise and are essential for personal and professional success.

Effective communication is one of the most critical soft skills. It involves not only expressing ideas clearly but also listening actively and empathetically.

Strong communication skills enable individuals to convey their thoughts, build rapport, and resolve conflicts effectively.

Leadership is another vital soft skill that sets individuals apart.

A good leader inspires and motivates others, sets clear goals, and guides the team towards achieving them. Leadership skills are crucial for driving innovation, managing change, and creating a positive work culture.

Problem-solving and critical thinking skills are also highly valued in today’s workplace. Being able to analyze complex situations, think creatively, and make informed decisions is essential for overcoming challenges and seizing opportunities.

If you join such a soft skills course Singapore, it will help your career and you immediately.

Intellisoft has several soft skills certification Singapore courses that can get up to 70% WSQ Grant.

Benefits of enhancing your soft skills

soft skills course singapore

Investing in the development of your soft skills can yield numerous benefits for your career and personal growth.

Here are a few reasons why enhancing your soft skills with a certification course in Singapore is worth the effort:

1. Improved Communication: Strong communication skills enable you to express your ideas clearly, build relationships, and collaborate effectively with colleagues and clients.

Clear and concise communication can prevent misunderstandings, enhance productivity, and contribute to a positive work environment.

2. Enhanced Leadership Abilities: Developing your leadership skills can open doors to managerial positions and increase your chances of career advancement.

Effective leaders inspire and motivate their teams, drive innovation, and foster a culture of excellence.

3. Better Problem-Solving: Problem-solving and critical thinking skills are essential for overcoming challenges and finding innovative solutions. By honing these skills, you can become a valuable asset to your organization and contribute to its success.

4. Increased Adaptability: Soft skills such as adaptability and resilience enable you to navigate change and thrive in dynamic work environments. The ability to quickly adapt to new technologies, processes, and market trends is crucial for staying ahead in today’s rapidly evolving world.

5. Enhanced Professional Reputation: By demonstrating strong soft skills, you can build a positive professional reputation. Employers and colleagues will perceive you as reliable, trustworthy, and capable of handling difficult situations with grace and professionalism.

Soft skills in demand in Singapore

communication skills course singaporeSingapore’s thriving economy and diverse workforce make it a hub of opportunities for professionals from various industries. Several soft skills are particularly in demand in the Singaporean job market. Thus, attending a soft skills course Singapore, and getting certified with a WSQ Course will help you show your competence to potential employers.

1. Communication Skills: Singapore is a multicultural society with a strong emphasis on effective communication. Employers value candidates who can articulate ideas clearly, adapt their communication style to diverse audiences, and build rapport with clients and colleagues. Making an impactful presentation helps you to communicate better in large settings & meetings.

2. Leadership Abilities: As organizations in Singapore strive for growth and innovation, leadership skills are highly sought after. Employers value individuals who can lead teams, drive change, and inspire others to achieve their full potential.

3. Problem-Solving and Critical Thinking: Singapore’s competitive business landscape requires individuals who can analyze complex problems, think critically, and make informed decisions. Employers seek candidates who can contribute fresh perspectives and innovative solutions. Soft Skills like Communication Skills, and Problem Solving Skills are in high demand, according to SkillsFuture Surveys.

4. Adaptability and Resilience: Singapore’s rapidly changing business environment necessitates individuals who can adapt quickly to new technologies, market trends, and organizational changes. Employers value candidates who can thrive in dynamic work environments and embrace change.

The role of a Soft Skills Course in Personal Development

soft skills training providers in singaporeA soft skills course Singapore can play a crucial role in your personal and professional development. It provides a structured and focused approach to enhancing your soft skills, enabling you to acquire new knowledge, practice essential techniques, and receive feedback from experienced trainers.

Unlike generic self-help books or online resources, a soft skills course offers a tailored curriculum designed to address specific skill gaps and industry requirements. It provides a comprehensive learning experience that combines theoretical knowledge with practical application.

A well-designed soft skills course in Singapore at Intellisoft Systems incorporates

  • interactive activities,
  • case studies,
  • role plays, and
  • group discussions

to facilitate active learning and skill development. It allows you to practice new skills in a safe and supportive environment, gaining confidence and proficiency along the way.

In addition to developing specific soft skills, a course can also enhance your self-awareness and emotional intelligence. It helps you understand your own strengths and weaknesses, improve your ability to empathize with others, and navigate social interactions with greater ease.

Choosing the right soft skills course in Singapore

Time Management Skills Training Singapore

With a plethora of soft skills courses available in Singapore, choosing the right one can seem overwhelming. Here are a few factors to consider when selecting a course that aligns with your needs and goals:

1. Reputation and Accreditation: Look for courses offered by reputable training providers with a proven track record of delivering high-quality programs. Check if the course is accredited or endorsed by recognized industry bodies or educational institutions.

2. Course Content and Structure: Assess the course syllabus to ensure it covers the specific soft skills you want to develop. Consider the teaching methods, duration, and delivery format (in-person, online, or blended) to determine if it suits your learning style and schedule.

3. Trainers and Facilitators: Research the qualifications and experience of the trainers/facilitators delivering the course. Look for professionals who have relevant industry experience and a strong background in training and development.

4. Past Participants’ Feedback: Read testimonials or reach out to past participants to get insights into their experience with the course. Their feedback can provide valuable information about the course’s effectiveness, relevance, and overall value.

5. Cost and ROI: Consider the course fees in relation to the potential benefits and career advancements it can offer. Assess the return on investment (ROI) by evaluating how the skills acquired in the course can contribute to your professional growth and earning potential.

Remember, the right soft skills course can be a transformative experience that propels your career forward. Take the time to research and choose wisely to maximize the value you gain from the course.

Top soft skills courses in Singapore

presentation and public speaking skills in Singapore

Singapore offers a wide range of soft skills courses tailored to different industries and career levels. Here are some of the top courses that can help you enhance your skill set and advance your career. Intellisoft is the top choice for soft skills training providers in Singapore.

1. Effective Communication and Interpersonal Skills: This course focuses on improving verbal and written communication skills, active listening, and building rapport with others. It equips participants with the tools to express ideas clearly, resolve conflicts, and collaborate effectively.

2. Leadership and Management Development: Designed for aspiring and current leaders, this course covers topics such as leadership styles, team management, decision-making, and strategic thinking. It aims to develop participants’ ability to lead and inspire others towards achieving organizational goals.

3. Problem-Solving and Critical Thinking: This course enhances participants’ analytical and problem-solving skills, enabling them to think critically, make sound decisions, and implement effective solutions. It covers techniques such as root cause analysis, creative thinking, and decision-making frameworks.

4. Emotional Intelligence and Relationship Building: This course focuses on developing emotional intelligence, self-awareness, and interpersonal skills. It helps participants understand their own emotions and those of others, manage conflicts, and build strong relationships.

5. Adaptability and Change Management: This course equips individuals with the skills to navigate change, embrace uncertainty, and thrive in dynamic work environments. It covers topics such as resilience, agility, and innovation, enabling participants to adapt quickly to new challenges and opportunities.

These are just a few examples of the many soft skills courses available in Singapore. Take the time to explore different options and select the courses that align with your career goals and development needs.

Tips for maximizing the benefits of a soft skills course

Enrolling in a soft skills course is just the first step towards enhancing your skill set. To maximize the benefits and ensure long-term growth, consider implementing the following tips:

1. Set Clear Goals: Before starting the course, define your goals and objectives. What specific skills do you want to develop or improve? How will these skills contribute to your career advancement? Setting clear goals will help you stay focused throughout the course.

2. Actively Engage: Participate actively in the course by asking questions, sharing your experiences, and contributing to discussions. Be open to feedback and constructive criticism from trainers and fellow participants. Engaging actively will enhance your learning experience and foster meaningful connections.

3. Practice and Apply: Take every opportunity to practice the skills you learn during the course. Experiment with new techniques in your daily work or personal life. Reflect on your experiences and identify areas for improvement. Applying the skills consistently will help you internalize them and make them a natural part of your behavior.

4. Seek Feedback: Request feedback from trainers, peers, and colleagues to gauge your progress and identify areas for further development. Act on the feedback received, and continuously seek opportunities to refine your skills. Constructive feedback is invaluable for growth and improvement.

5. Network and Collaborate: Capitalize on the networking opportunities provided during the course. Connect with like-minded professionals, share insights, and build relationships that can support your career growth. Collaborate on projects or initiatives to further develop your teamwork and communication skills.

6. Continued Learning: Soft skills development is an ongoing process. Stay updated with the latest industry trends and practices by reading books, attending webinars, or joining professional associations. Continuously seek opportunities to expand your knowledge and refine your skills.

By implementing these tips, you can ensure that the soft skills course becomes a catalyst for your personal and professional growth, propelling you towards greater success.

How to apply newly acquired soft skills in the workplace

Acquiring new soft skills is only valuable if you can effectively apply them in the workplace. Here are some strategies to help you translate your newly acquired skills into tangible results:

1. Start Small: Begin by applying your newly acquired skills in low-stakes situations. Practice active listening during meetings, provide constructive feedback to colleagues, or take the lead on a small project. Starting small allows you to gain confidence and refine your skills before tackling more significant challenges.

2. Seek Opportunities: Actively seek opportunities to apply your soft skills in your day-to-day work. Volunteer for projects that require collaboration, leadership, or problem-solving. Look for ways to communicate more effectively with stakeholders or resolve conflicts within your team.

3. Reflect and Learn: Regularly reflect on your experiences and assess how your soft skills have contributed to positive outcomes. Identify areas for improvement and seek feedback from colleagues or supervisors. Continuously learn and refine your skills based on these reflections.

4. Be Patient: Developing and applying soft skills takes time and practice. Be patient with yourself and acknowledge that growth is a gradual process. Celebrate small victories and learn from setbacks. With persistence and dedication, you will see the impact of your enhanced soft skills over time.

Conclusion: Taking your career from good to great with soft skills

In today’s highly competitive job market, technical expertise alone is no longer sufficient for career success. Employers are increasingly prioritizing candidates with strong soft skills, such as communication, leadership, and problem-solving abilities.

Enhancing your skill set with a soft skills course in Singapore can provide you with the tools and knowledge to excel in your field. By investing in your personal development, you can unlock new career opportunities, enhance your professional reputation, and become a highly sought-after candidate in the job market.

So, why wait? Take that leap and enroll in a soft skills course in Singapore today. From good to great, your journey towards personal and professional growth starts now.

How To Calculate CPF Contribution With Excel [2024 Update]

How To Calculate CPF Contribution Using Microsoft Excel - Free Template in Excel

UPDATED FOR CPF CONTRIBUTION RATE CHANGES FROM THE YEAR 2024

How To Calculate CPF Contribution Using Microsoft Excel - Free Template in Excel
How To Calculate CPF Contribution Using Microsoft Excel – Free Template in Excel

Learn how to Calculate CPF contribution for Employees and Employers in Singapore by using Microsoft Excel. This covers Singapore Citizens and Singapore Permanent Residents SPRs.

If you want to join our Excel course in Singapore & improve your skills, we have multiple courses – Basic Excel for Analytics, Advanced Excel Courses in Singapore & VBA Macro Programming Courses.

Singapore CPF Rules
In Singapore, all salaried employees need to contribute 5-20% of their salary, depending on age to their Central Provident Fund or CPF. The employer contributes 7.5% to 17% of the salary to the CPF Fund, depending on the age of the worker.

The CPF contribution calculator for employers and employees can be done using Microsoft Excel.

CPF contribution calculator Excel File is available for download below.

Employee’s age
(years)
CPF Contribution Rates changes from 1 Jan 2022
(monthly wages > $750) Based on CPF Board
Total
(% of wage)
By employer
(% of wage)
By employee
(% of wage)
55 & below 37 17 20
Above 55 to 60 28 14 14
Above 60 to 65 18.5 10 8.5
Above 65 to 70 14 8 6
Above 70 12.5 7.5 5
Excel for HR Professionals

So payroll executives from Finance or HR professionals need to calculate the correct amount for the contribution to CPF, and provide the net salary to the employees who are Singapore Citizens or Singapore Permanent Residents (SPR). The employer also needs to know their total payroll expenses so as to know their Payroll Liability each month.

Calculating CPF Rates for Employees & Employers in Singapore
I have created a simple Excel spreadsheet to calculate the CPF Rates and Amounts in Singapore in this matter. If you wish to use this you can fill in your own Singapore Citizen & PR employee’s details, their age & basic pay, and the following is automatically calculated:

Learn Microsoft Excel 2019
Learn Advanced Excel 2019 @Intellisoft
  • Employee’s contribution,
  • The employer contribution,
  • Total CPF contributions,
  • Total payable to CPF,
  • Net salary to the employee
  • Gross Salary expense of the employer

The spreadsheet uses simple formulas that are already pre-programmed. So you can just begin to use this spreadsheet for your company.  It has been tested for CPF Contribution Rates in 2022 and beyond, and everything will work smoothly.

Increase in CPF contribution rates from 1 January 2022

  • The CPF contribution rates for employees aged above 55 to 70 have been increased.
  • The increase in the CPF contribution rates will be fully allocated to the employees’ Special Accounts to provide a bigger boost to their retirement income.
  • For those earning monthly wages of more than $500 to $750, the employee contribution rates will continue to be phased in.
  • There are no changes to the graduated contribution rates for first and second year Singapore Permanent Residents (SPRs). 

If you need any enhancements in calculating employee CPF & contributions payable for Payroll expenses for companies in Singapore or have any comments, do let us know. You can leave a comment below this post.

And of course, if you wish to learn how to create such excel spreadsheets, and use simple Microsoft Excel formulas and functions, you can also attend our Microsoft Excel Training classes in Singapore.

Advanced Excel 2019 Course (2 Days) – with SDF Funding

Basic / Intermediate Excel 2019 Training (2 Days) – With SDF Funding

Advanced Excel for HR Professionals (2 Day Classroom Training)

Hope you like this CPF Calculator Singapore Excel Template for calculating the CPF in Singapore. If you like it, I would appreciate it if you Like Us on Facebook, and leave a comment below!

Cheers,
Vinai Prakash, MBA, PMP, ITIL, GAP, Six Sigma
Master Trainer, Intellisoft Systems

Vinai teaches Advanced Excel Techniques, Dashboard Techniques using Excel, Data Interpretation and Analysis Training courses at Intellisoft. He has trained over 25,000 students in over 28 countries and regularly conducts Excel Workshops in Singapore, Malaysia, Indonesia, Australia, India, Dubai, Egypt, Zimbabwe, South Africa etc.

Contact Intellisoft to book a Certified Microsoft Excel Trainer for your Training needs.

DOWNLOAD EXCEL CPF CALCULATOR

Sparklines in Microsoft Excel to Visualize Data Quickly

Sparklines in Microsoft Excel Traiing

In Microsoft Excel, some of the new features introduced in the past 15 years are amazing for every day use. Spark lines and Slicers are some of these amazing gems of Excel.

These improvements to PivotTables and other existing features, can help us to discover patterns or trends in the data. To get started with the features of Excel, first we will look at the details of the  Sparkline and slicers features of Excel.

What are Spark lines in Excel, and How to Use Them

Sparkline in Excel
Sparkline in Excel

Sparklines are tiny charts that is used to fit in a cell to visually summarize trends beside the data. 

Sparklines are an extremely useful and user friendly feature in Microsoft Excel that allow you to create small, visual representations of data trends within individual cells.

These tiny charts provide a compact way to display trends, variations, and patterns in your data without taking up a lot of space. Sparklines are particularly useful when you want to quickly analyze data at a glance or within a confined area, such as a cell or a small column.

There are three main types of sparklines in Excel:

  1. Line Sparklines: Line sparklines show trends over a period of time. They are typically used to display data points in a line chart format, helping you visualize trends, fluctuations, and patterns over time.
  2. Column Sparklines: Column sparklines are used to compare values among different data points. They can help you identify variations and relative sizes of data within a specific context.
  3. Win/Loss Sparklines: Win/loss sparklines are used to represent binary data, often indicating “win” or “loss” scenarios. These are typically shown using icons or symbols to denote positive or negative outcomes.

Since sparklines show trends occupies less space, they are exclusively useful for dashboards and other places where we need to show a glimpse of the business in an simple practical visual format.

In the image to the left, the sparklines that appear in the Trend column lets us have a quick look of the performance of each department in the month of May.

If you want to join our Excel course in Singapore & improve your skills, we have multiple courses – Basic Excel for Analytics, Advanced Excel Courses in Singapore & VBA Macro Programming Courses.

Key features and benefits of Spark Lines in Excel include:

  • Compact Representation: Sparklines are designed to fit within individual cells, making them an efficient way to provide data insights in a constrained space.
  • Visual Analysis: By using simple visual cues, sparklines allow you to quickly identify trends and patterns, even without delving into detailed data analysis.
  • Easy to Create: Creating sparklines in Excel is straightforward. You can insert sparklines through the “Sparkline Tools” tab on the Excel ribbon after selecting the data range you want to visualize.
  • Dynamic Updates: Sparklines are dynamic, meaning they update automatically when you change the data or adjust the range they’re based on.
  • Conditional Formatting: You can apply conditional formatting to sparklines, enhancing their visual impact. For example, you can color-code sparklines based on specific conditions, making trends more apparent.
  • Compatibility: Sparklines are available in most modern versions of Excel, including Excel 2010 and later.

To Create Spark lines in Excel:

  1. Select the cell where you want the sparkline to appear.
  2. Go to the “Insert” tab on the Excel ribbon.
  3. In the “Sparklines” group, choose the type of sparkline you want (Line, Column, or Win/Loss).
  4. Select the data range you want to visualize.
  5. Click “OK,” and the sparkline will be generated within the selected cell.

Remember that while sparklines provide a quick and visual overview of data trends, they might not replace the depth of analysis that larger charts or graphs can offer. Use sparklines in scenarios where space is limited and you need to provide a concise snapshot of data trends.

When and where is the best use of Excel sparklines

Excel sparklines are best used in situations where you need to provide a quick and concise visual representation of data trends within a limited space.
They are particularly effective when you want to highlight trends, variations, and patterns in your data without the need for extensive data analysis. Here are some scenarios where Excel sparklines can be most beneficial:
  1. Dashboards and Reports: Sparklines are ideal for creating dashboards and reports that require a compact presentation of key performance indicators (KPIs) and trends. You can include multiple sparklines in a small area to provide an overview of various metrics.
  2. Tables and Data Lists: When working with data tables or lists, you can add sparklines next to numeric data to provide context and visual insight into how values are changing over time or between categories.
  3. Financial Data: Use sparklines to visualize changes in financial data, such as stock prices, revenue, expenses, or budget allocations. Line sparklines can help show trends over time, while column sparklines can highlight variations between categories.
  4. Project Management: Incorporate sparklines in project management to illustrate task completion, project progress, or resource allocation. For instance, you can display task completion rates using win/loss sparklines.
  5. Sales and Marketing: Use sparklines to represent sales figures, conversion rates, or website traffic data. These visualizations can help sales and marketing teams quickly assess performance.
  6. Comparative Analysis: When comparing data sets or categories, column sparklines can show relative values and trends, making it easy to identify patterns and outliers.
  7. Scorecards: In performance scorecards or performance reviews, sparklines can visually summarize an individual’s progress or achievement over time.
  8. Educational Purposes: Sparklines can be used in educational materials to help students understand data trends and patterns, making learning about data analysis more engaging.
  9. Emails and Presentations: Incorporate sparklines in emails or presentations to provide a quick visual representation of data trends without overwhelming the audience with extensive charts.
  10. Data Visualization in Cells: In spreadsheets where you need to keep the data and visualizations together, sparklines offer a convenient way to incorporate visual insights directly into the data cells.

While sparklines are excellent for providing quick insights, they might not replace the need for more detailed charts and graphs in situations where deeper analysis is required.

Additionally, when using sparklines, it’s essential to ensure that the data you’re visualizing is appropriate for the type of sparkline you’re using (line, column, or win/loss) to ensure accurate representation.

What are Slicers in Microsoft Excel

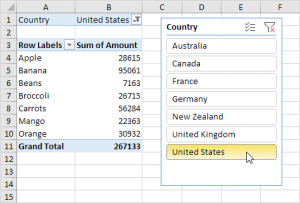
Excel Slicers Sample

Slicers are visual controls. They let us quickly refine data in a PivotTable in an interactive, automatic manner. If we insert a slicer, we can use buttons to quickly segment and refine the data to display appropriate results.

Not only that, when we apply more than one filter to the PivotTable, we no longer have to open a list to see which filters are enforced to the data. Rather, it is displayed on the screen in the slicer.

We can make slicers relate to the workbook formatting and easily reuse them in other PivotTables & PivotCharts.

Slicers provide an intuitive and user-friendly way to filter and analyze data without the need to access complex filter menus or dialogs.

Slicers create buttons or visual elements that you can click or select to filter data, making data analysis more dynamic and accessible.

When you insert a slicer into an Excel workbook, it creates a dashboard-like interface where users can easily filter data by clicking on specific elements. Slicers are especially useful for large datasets and complex reports where traditional filtering methods might be cumbersome.

When to Use Slicers in Excel:

  1. Pivot Tables and Pivot Charts: Slicers are primarily designed to work with pivot tables and pivot charts. They enhance the usability of these tools by providing a simple way to filter and slice data dynamically.
  2. Large Datasets: When dealing with large datasets, using traditional filter dropdowns can be overwhelming. Slicers offer a more user-friendly experience by visually representing filtering options.
  3. Interactive Dashboards: If you’re creating interactive dashboards or reports, slicers can be a great addition. Users can quickly filter data to focus on specific aspects of the report.
  4. Data Exploration: When you want to explore data trends and patterns quickly, slicers allow you to filter data on the fly without the need to constantly modify filter settings.
  5. Collaborative Work: Slicers are particularly useful in collaborative environments where multiple users need to analyze data. They provide a consistent and easy-to-understand filtering interface.
  6. Sales and Marketing Analysis: Slicers are beneficial for sales and marketing reports where you want to analyze data by different criteria such as time periods, regions, products, or customer segments.
  7. Comparative Analysis: Slicers can be used to compare data across different categories, allowing you to instantly switch between various data subsets for comparison.
  8. Data Visualization: When creating presentations or reports for non-Excel users, slicers provide a more intuitive way to interact with and explore data.

How to Use Slicers in Excel:

  1. Create a Pivot Table or Pivot Chart: Before adding slicers, you need to create a pivot table or pivot chart based on your data.
  2. Insert Slicer: Go to the “PivotTable Analyze” or “Analyzing” tab on the Excel ribbon, then click on the “Insert Slicer” button. Choose the fields you want to use as slicers.
  3. Arrange Slicers: Once inserted, arrange the slicers on your worksheet as needed. You can resize them, move them around, and align them to create an organized layout.
  4. Filter Data: When you interact with a slicer by clicking on an element (e.g., selecting a specific category or time period), the associated pivot table or pivot chart will instantly update to show the filtered data.
  5. Multiple Slicers: You can insert multiple slicers based on different fields to provide more comprehensive filtering options.

Remember that while slicers are a fantastic tool for interactivity and data analysis, they are best suited for scenarios involving pivot tables and pivot charts. For traditional data tables, you might want to stick with standard filtering options.

excel trainingIf you would like to learn more about these new features of Microsoft Excel, or would like to attend the Advanced Microsoft Excel Training, do contact us at Intellisoft Systems.

If you have any further questions or want to join a training on how to use Sparklines, contact Intellisoft for Corporate Training on Excel or call at +65 6250-3575.

Trainer: We have certified trainers who excel in imparting their knowledge and are very patient. Master Trainer Vinai teaches Advanced Excel Techniques, Dashboard Techniques using Excel,  Advanced Data Analytics & Data Visualization Training courses at Intellisoft.

Vinai has trained over 15,000 students in over 18 countries, and regularly conducts Excel Workshops in Singapore, Malaysia, Indonesia, Australia, India, Dubai, Egypt, Zimbabwe, South Africa etc.

Conditional Formatting in Microsoft Excel For Better Data Visualization

Conditional Formatting in Excel using Color Scales for Data Visualization Training

Improved conditional formatting in Excel For Better Data Visualization

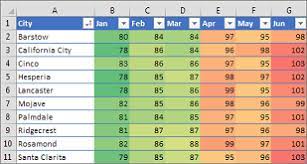
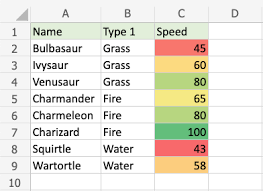
Conditional Formatting in Excel - Sample ScreenshotConditional formatting makes it easy to emphasize important cells or ranges of cells, highlight unusual values, and visualize data by using data bars, color scales, and icon sets. In each newer version of Excel, it includes further more formatting flexibility.

Conditional formatting in Excel is a powerful feature that allows you to automatically apply formatting to cells based on specific conditions.

It’s a fantastic tool for visualizing data trends, highlighting important information, and making your spreadsheets more informative and user-friendly.

If you want to join our Excel course in Singapore & improve your skills, we have multiple courses – Basic Excel for Analytics, Advanced Excel Courses in Singapore & VBA Macro Programming Courses.

Here are some of the best ways to use conditional formatting, along with concrete examples:

Color Scales in Excel Conditional Formatting

  1. Color Scale for Data Ranges:
    • Use a color scale to visually represent the distribution of data values within a range.
    • Example: Apply a green-to-red color scale to a list of temperature readings to quickly identify hot and cold temperatures.
  2. Icon Sets for Comparisons:
    • Apply icon sets to cells to compare values and show trends using icons like arrows or traffic lights.
    • Example: Use upward and downward arrows to indicate whether sales figures have increased or decreased compared to the previous month.
  3. Data Bars for Proportional Data:
    • Use data bars to create horizontal bars within cells to represent the proportional value of each cell compared to others.
    • Example: Apply data bars to visualize the relative sizes of monthly expenses in a budget spreadsheet.
  4. Highlighting Duplicates and Unique Values:
    • Apply conditional formatting to highlight duplicate or unique values in a range of cells.
    • Example: Highlight duplicate names in a list of customers to identify potential data entry errors.
  5. Color-Coded Prioritization:
    • Use conditional formatting to color-code cells based on priority levels, making it easy to identify important tasks or items.
    • Example: Color-code tasks in a to-do list as high, medium, or low priority.
  6. Custom Formulas for Complex Conditions:
    • Create custom formulas for more complex conditions that aren’t covered by built-in formatting rules.
    • Example: Apply conditional formatting to highlight cells with values greater than the average of a range.
  7. Highlighting Dates:
    • Apply conditional formatting to highlight dates that fall within a certain range, such as upcoming deadlines or overdue dates.
    • Example: Use red formatting to highlight dates that are past the current date in a project timeline.
  8. Data Validation Feedback:
    • Use conditional formatting to provide feedback on data validation rules, making it clear why certain entries are invalid.
    • Example: Apply a red border to cells that contain text longer than a specified character limit.
  9. Heat Maps for Data Analysis:
    • Create heat maps by applying conditional formatting to visualize patterns and trends in large datasets.
    • Example: Apply color scales to sales data to quickly identify regions with the highest and lowest sales figures.
  10. Formula-Based Alerts:
    • Use conditional formatting to trigger alerts or notifications based on specific formula-driven conditions.
    • Example: Apply a bold font and red text to cells where inventory levels are below a certain threshold.Icons for use in Conditional Formatting of Data in Excel

Key to effective conditional formatting is to choose formatting options that align with your goals and data presentation needs. By using conditional formatting strategically, you can make your data more visually engaging and facilitate better decision-making.

New icon sets: In Excel, we  can access to more icon sets, including triangles, stars, and boxes. We can also mix and match icons from different sets and more easily hide icons.

For example, we might choose to display icons only for high profit values and remove them for middle and lower values.

More options for data bars: Excel now comes with new formatting options for data bars. You can apply solid fills or borders to the data bar, or set the bar direction from right-to-left instead of left-to-right.

Not only that, data bars for negative values appear on the opposite side of an axis from positive values.

excel trainingIf you would like to learn more about these new features of Microsoft Excel for data analysis and data visualization or would like to attend the Microsoft Excel Training, do contact us at Intellisoft Systems.

If you have any further questions then contact us through email training@intellisoft.com.sg or call at +65 6250-3575!!!

The Best Trainer for Advanced Data Analytics With Excel in Singapore

Mr. Vinai, Prakash the founder of Intellisoft Systems teaches Advanced Excel Techniques, Dashboard Techniques using Excel, Data Interpretation and Analysis Training courses at Intellisoft.

He has trained over 15,000 students in over 18 countries, and regularly conducts Excel Workshops in Singapore, Malaysia, Indonesia, Australia, India, Dubai, Egypt, Zimbabwe, South Africa etc.

Free Tips, Tutorials & Training Grants Info

Learn from expert tips, tricks and resources for Excel, PowerPoint, Photoshop, Python, Power BI, Project Management, IT, Soft Skills & more with our Email Newsletter.
Plus get the latest news on Grants. Join Today!

Found What You Were
Looking For?

Just Tell us...

We're Here To Help You!